What is a Dusker?
Some important context before getting into the Dusker overlay, is explaining what exactly a Dusker is in the first place. Duskers are an enemy type in Towerborne that act like ghost zombies. A big pillar of their visual design is a ghostly energy, similar to fire, that we called the “Dusker Overlay”. This Dusker Overlay, would become their defining characteristic that distinguished them from other humanoid characters in game. The Dusker Overlay went through several design iterations. Some particle based, others material based, all custom made to fit a specific Dusker enemy model. As time went on, the design for the Duskers evolved from an enemy archetype into a grander possession mechanic.
Dusker Design Change
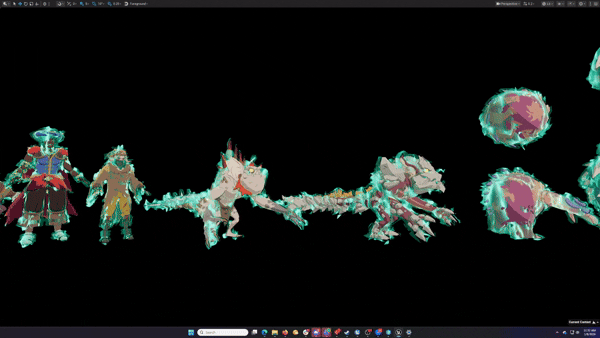
With the introduction of Graves, the final boss of Towerborne, the Dusker energy idea went through a big change. The first change was the requirement that Graves have the same Dusker energy (According to the Narrative, Graves is the source of the Dusker Energy) that regular Dusker enemies had. This alone was a big design challenge, as Graves is significantly larger than the Duskers. The second change in the Dusker Energy design was to make it a global system. Meaning any character could be possessed by Dusker Energy, regardless of size, shape, skeleton, or archetype.
Re-Imagining Dusker Energy
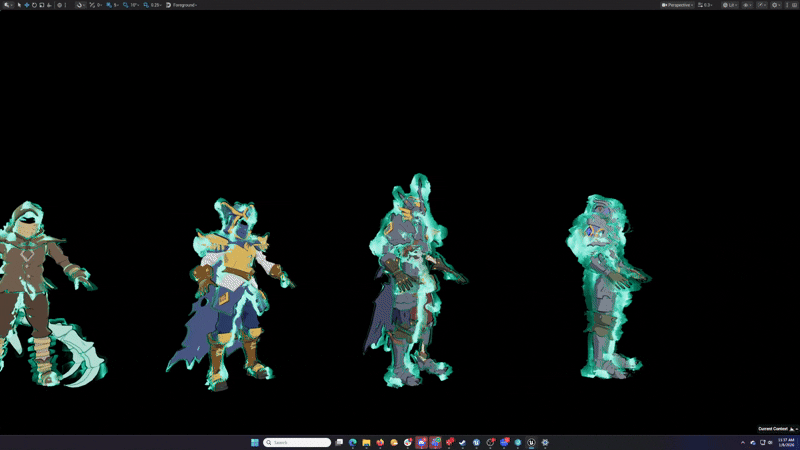
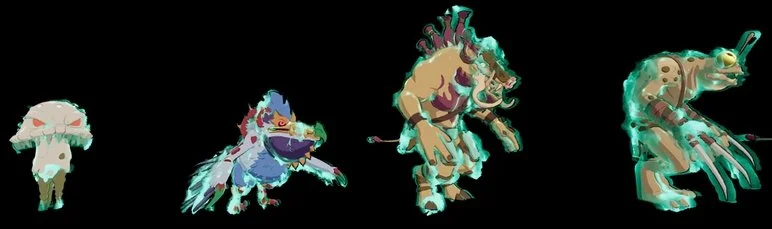
Creating a one size fits all solution for an energy overlay was going to be a big challenge. Towerborne has incredible amounts of variation in terms of character sizes, ranging from small crabs to giant mushroom monsters..
To accommodate this varied cast of characters, I broke down the larger task into specific actionable design pillars which I will discuss in greater detail below.
The effect would have to be UV agnostic
The effect Would have to slightly modify the silhouette of a character without breaking it
The effect had to add minimal additional cost to the GPU/CPU.
UV-Agnostic Overlay
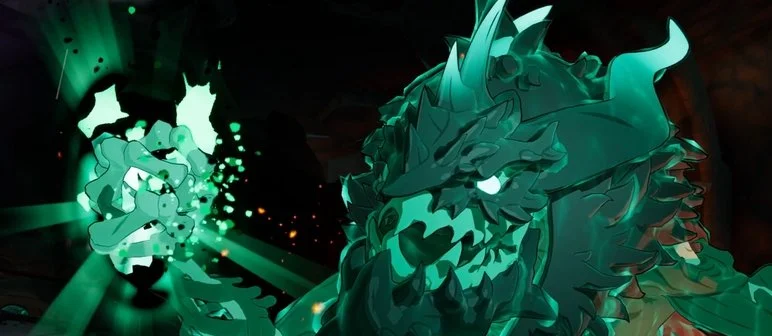
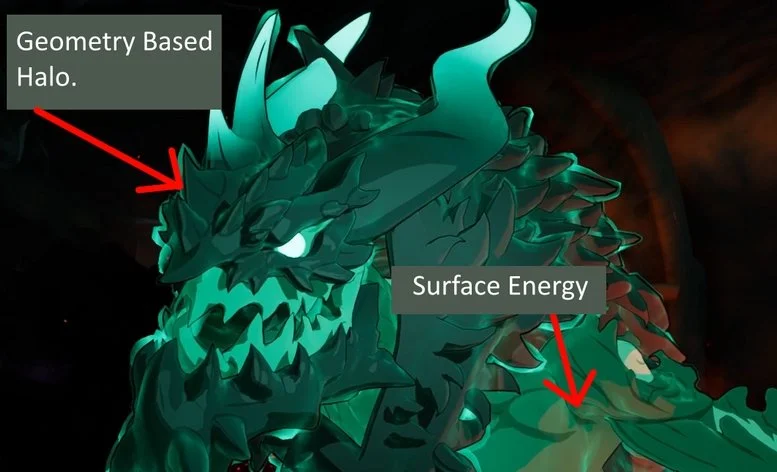
Characters in Towerborne are rendered using a proprietary cartoon shader that derives its color from UV’s based on quadrants, not traditional unwrapping. What this looks like from a UV perspective is characters would have all their UV’s clumped into corners with no logical spatial relation to other parts of the mesh. This makes any traditional UV operations not possible across multiple characters. The only option is either using world projected UV’s or world aligned 3d noise solution. In this case I opted to use 3d noise as it would be easier to control from a unified set of parameters allowing smooth transitions through space. Using the result of a controlled 3d noise, I would run that through several color, animation, & transform operations that fed into two passes. A Geometry based halo using an offset shell to surround a character, and a direct surface energy pattern that would render inside a character surface material.
Modifying Silhouettes without breaking them
In order to modify a silhouette without altering the base character I introduced a type of green halo that glows on the outside of characters. It was critically important that this halo rendered behind characters. Previous ideation involving characters having a type of shell had poor results. Trying something new, we used a novel feature in Unreal 5 called “Material Overlay”, this allowed us to leverage a base version of a skeletal mesh, create a skinned duplicate on the fly, and apply a new material instance on top of the secondary mesh. I used this new technology to grab a character, make a glowing distorted duplicate of its base mesh, that then was forcefully rendered behind a character. The result is a ghostly outline shell of any character, regardless of shape or size, that never obstructed the base silhouette of a character.
Rendering Cost
The finished effect added minimal rendering costs to a character. The base surface material effect was an additive function only, adding slight cost to the “emissive” value of a character’s base material. The glowing halo around the characters uses a masked operation so as to not add any cost due to translucent overdraw. The overall cost of the material override geometry was not noticeable in the CPU or GPU before/after profiling, meaning the performance cost so low as to not be noticed.
User Workflow
I designed the workflow of the Dusker Overlay to have as much global control as possible while maintaining some ability for localized offsets. To achieve this I used a global Material Parameter Collection as a base driver of all visual elements. Using 3d noise as a base, I was able to rapidly iterate across all character types using just a few parameters that controlled animation speed, texture frequency, and various color operations. This worked perfectly across %95 of all use cases. However this would inevitably break down on characters that were very large or very small. This challenge was one I foresaw early in the design stages. To address the outlying characters needs, I build special local offsets that could be activated on targeted characters material instances, enabling specialized tuning independent to the global system.

Final Thoughts
The Duskers as a feature was always going to be a challenge. As characters we were always fighting to balance visual noise with something that would perform relatively bug free. When the Dusker as a feature first became a possession mechanic there was a lot of concern from the team that this may not be feasible. I am proud to say that indeed is was feasible! The final result was more flexible system that was easy to use, cheaper to maintain, and visually satisfying to the end user.